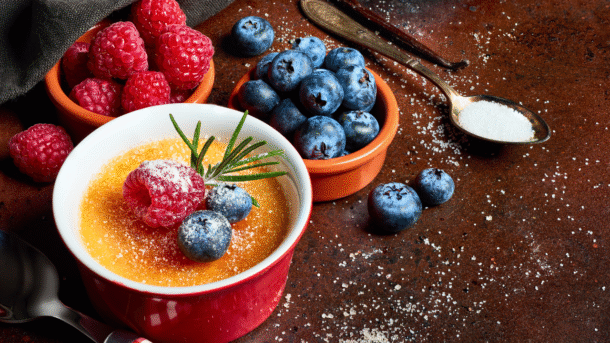
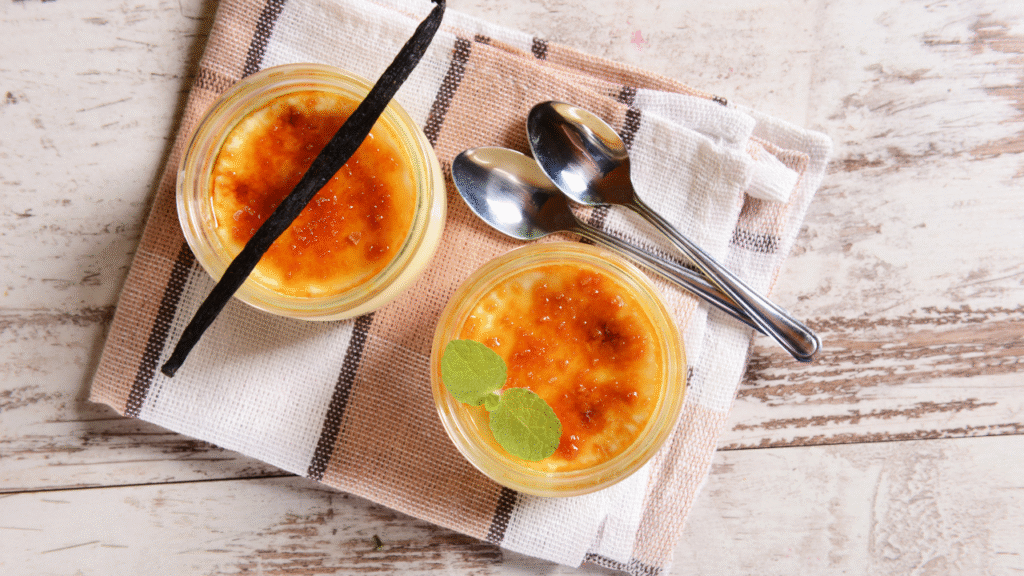
Crème brûlée might sound fancy, but it’s surprisingly simple to make—and even easier when you skip the kitchen torch. This version utilizes your oven’s broiler to create a classic caramelized sugar crust, offering all the elegance without requiring extra tools. Whether you’re impressing dinner guests or treating yourself to something sweet, this make-ahead dessert is a creamy, crunchy crowd-pleaser.
I first tried this method on a whim after misplacing my torch, and the result blew me away. It’s now my go-to method—no special gear, just great technique.
Why You’ll Love This Recipe
If you’ve ever felt intimidated by crème brûlée, this version is here to change that. It delivers all the indulgent texture and flavor of the original—but without needing special equipment like a torch.
Whether you’re baking for a special occasion or simply want to elevate your dessert game midweek, this recipe delivers restaurant-level results with minimal fuss. It’s elegant, impressive, and surprisingly simple to master.
This version is:
- Torch-free and beginner-friendly
- Rich and creamy with a satisfying sugar crunch
- Perfect for making ahead—ideal for holidays or dinner parties
- Customizable with flavor twists like citrus or espresso
- Naturally gluten-free
With just a few pantry staples, you’ll have a dessert that feels like a five-star treat.
What Ingredients Are In It


A great crème brûlée starts with just a few high-quality ingredients, each playing a crucial role in the final result. While the list may be short, the attention to detail in selecting these items makes all the difference.
In this section, we’ll walk through the ingredients alphabetically and offer helpful tips for picking the best versions—or making easy swaps if needed. Think of this as your flavor foundation.
Ingredients (Alphabetical):
- Coarse sugar – Used for the topping; creates a golden, crunchy finish. You can also use turbinado or demerara sugar.
- Egg yolks – These add richness and help the custard set properly.
- Fresh raspberries & mint sprigs – Optional garnish, but they add color and a fresh pop.
- Granulated sugar – Sweetens the custard and helps whip the yolks.
- Heavy cream – The custard’s creamy base. Use full-fat for the best texture.
- Salt – A pinch enhances flavor and balances the sweetness.
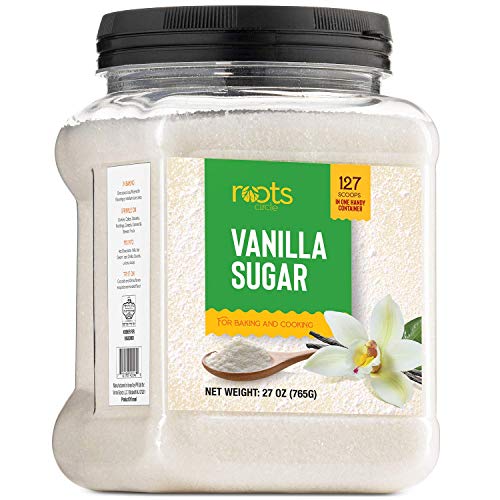
- Vanilla bean – Offers unmatched flavor. You can substitute it with pure vanilla extract.
- Water – Used for the water bath that gently bakes the custard.
What Tools Do You Need


You don’t need fancy gadgets or pro chef gear to pull this off—just a few reliable kitchen tools and some smart setup. From ramekins to a whisk, everything on this list helps simplify the process and ensures perfect results.
We’ll also suggest some practical alternatives in case you’re working with a minimal kitchen setup. Let’s set you up for success before we turn on the heat.
Tools (Alphabetical):
- Baking dish (high-sided) – Holds the ramekins and water bath.
- Baking thermometer – Ensures precise temperature control for the cream.
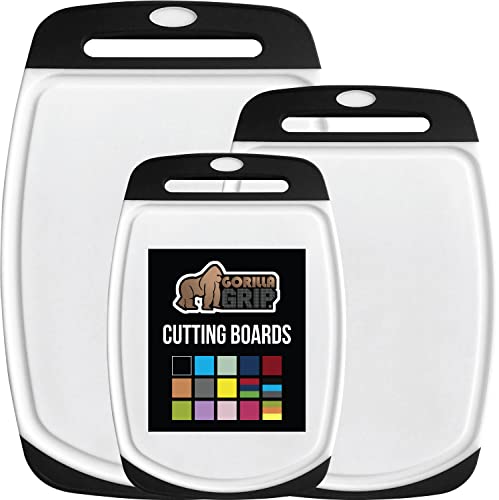
- Chef’s knife & cutting board – For slicing and scraping the vanilla bean.
- Deep saucepan – Used to heat the cream and vanilla.
- Kitchen towels & oven mittens – For safety when handling hot items.
- Measuring spoons – Accuracy matters in custards.
- Mixing bowl – Whisk the yolks and sugar in this.
- Ramekins (6-oz preferred) – Ideal shape and depth for even baking.
- Tea kettle or pitcher – Helps pour hot water into the baking dish safely.
- Whisk – Essential for combining yolks and sugar.
Tool Tip: No ramekins? Use heatproof ceramic mugs or a deep muffin tin as a substitute.
How to Make Broiled Crème Brûlée (Step-by-Step)
Ready to dive in? This step-by-step guide breaks everything down into manageable, beginner-friendly stages. Whether it’s your first time making custard or you’re just new to using a broiler, you’ll find helpful tips and technique callouts along the way.
Let’s walk through each phase of the process together—from infusing cream to achieving that iconic caramelized top.
1) Preheat & Prep
- Preheat oven to 325°F and place the top oven rack in the center.
- Arrange four 6-oz ramekins in a deep baking dish.
- Boil about 6 cups of water in a tea kettle or saucepan.
2) Infuse the Cream (10 minutes)
- Pour heavy cream into a saucepan.
- Slice the vanilla bean lengthwise and scrape out the seeds.
- Add the seeds and pod to the cream, stir in the salt, and heat until it reaches 180°F.
- Remove from the heat and discard the vanilla pod.
3) Mix the Yolks & Sugar (3 minutes)
- In a mixing bowl, whisk the egg yolks and granulated sugar until the mixture is thick and pale.
4) Temper the Eggs (2–3 minutes)
- Slowly add a few tablespoons of warm cream into the yolks while whisking constantly.
- Gradually whisk in the remaining cream until fully combined.
5) Create the Water Bath
- Carefully pour hot water into the baking dish around the ramekins.
- Avoid splashing water into the custards.
6) Bake (45–50 minutes)
- Bake until the custards are just set, with a slight jiggle in the center.
- Remove from oven and cool to room temperature.
- Cover and refrigerate for at least 4 hours or overnight.
7) Broil the Sugar Topping (4–5 minutes)
- Move the oven rack so ramekins sit 3–4″ below the broiler.
- Set the broiler to high.
- Sprinkle coarse sugar evenly over each custard.
- Broil until sugar melts and browns—watch closely!
8) Serve and Enjoy
- Let cool for 2–3 minutes so the sugar hardens.
- Top with raspberries and mint if desired.
Pro Tip: Use cold ramekins straight from the fridge to help keep the custard cool while the top broils.
Tips & Tricks

Once you’ve got the basics down, a few clever tricks can take your crème brûlée to the next level. This section is all about the little details—how to store it, how to make it ahead, and how to get that perfectly crisp top.
Whether you’re making one batch or a dozen, these extra tips will help you avoid pitfalls and boost your confidence in the kitchen.
- Make-ahead magic: Custards can be refrigerated for up to 2 days before broiling.
- Don’t skip the water bath—it prevents curdling and ensures even baking.
- Save those egg whites: Use them in meringues, omelets, or pavlova.
- Even sugar = even brûlée: Use a fine-mesh strainer to sprinkle sugar smoothly.
- Chill thoroughly: The colder the custard, the more dramatic the texture contrast.
Substitutions and Variations


Looking to put your spin on things? Crème brûlée is surprisingly flexible once you learn the core method. From flavor infusions to pairing ideas, this section provides creative ways to personalize the dessert or adapt it to meet dietary needs. Let’s explore how to make this dish truly your own.
Flavor Ideas:
- Add orange zest or lavender during cream infusion.
- Use espresso powder for a mocha twist.
- Substitute coconut cream and plant-based milk for a dairy-free version.
Pairing Suggestions:
| Flavor | Best Drink Pairing | Dessert Combo |
|---|---|---|
| Classic Vanilla | Moscato or Earl Grey | Fresh berries or biscotti |
| Citrus | Sparkling wine | Almond cookies |
| Coffee | Espresso or stout beer | Dark chocolate squares |
Final Thoughts

Crème brûlée is one of those timeless desserts that never fails to impress—and now it’s in reach for every home cook. This torch-free method is just as satisfying and even more accessible. Whether you’re baking for guests or treating yourself, this recipe delivers luxurious flavor with no fuss.
I’d love to see your results! Leave a comment, tag me on social, and don’t forget to share this recipe if you loved it. 🧡
Happy Cooking,
Frequently Asked Questions – Broiled Crème Brûlée (No Torch Needed)

Every home cook encounters questions, especially when trying a new recipe for the first time. This FAQ section addresses some of the most frequently asked questions about ingredients, techniques, and substitutions.
Whether you’re curious about storage, dietary swaps, or broiler tips, you’ll find quick answers right here. Think of it as your cheat sheet for smooth, confident baking.
Can I use vanilla extract instead of a vanilla bean?
Yes! If you don’t have a vanilla bean, use 1½ teaspoons of pure vanilla extract. For the best flavor, add the extract after heating the cream—this preserves its delicate aroma and prevents it from cooking off.
How far ahead can I make this?
You can make the custards up to 2 days in advance and store them in the fridge, tightly covered. For the best contrast in texture, wait to broil the sugar topping until just before serving so it stays crisp and crackly.
What sugar should I use on top?
For that signature caramelized crunch, use a coarse sugar like turbinado or demerara. These sugars melt evenly under the broiler and create a beautifully golden, shatterable crust that’s hard to resist.
Can I use milk instead of cream?
It’s not recommended. Regular milk lacks the fat needed for the custard to set properly, resulting in a runny or curdled texture. Stick with heavy cream for the rich, smooth consistency that makes crème brûlée so luxurious.
What’s the best ramekin size?
6-ounce ramekins with taller sides are ideal, especially when broiling. They help insulate the chilled custard from the intense top heat, preventing it from warming too much during caramelization. Shallower ramekins work well if using a kitchen torch instead.
Do I really need a water bath?
Yes—a water bath (bain-marie) is essential for custards like crème brûlée. It ensures the custard cooks slowly and evenly by surrounding it with gentle, moist heat. Skipping it can lead to overcooked edges and a grainy texture.
How can I make this dairy-free?
Use full-fat coconut milk or a plant-based creamer blend (like oat or almond) designed for cooking. The texture may be slightly less rich, but you’ll still get a silky, flavorful custard. Be sure to chill thoroughly before broiling.
Is broiling safe for custard?
Yes—as long as your custards are fully chilled before broiling, you’re good to go. The cold custard base helps resist the heat, while the sugar on top caramelizes quickly. Just watch closely to avoid burning or overheating.
What can I do with leftover egg whites?
Don’t toss them! Leftover egg whites can be used in meringues, macarons, soufflés, or even a fluffy egg white omelet. Store them in an airtight container in the fridge for up to 4 days—or freeze for longer storage.
How should I store leftover crème brûlée?
Store any leftover custards covered in the refrigerator for up to 3 days. If you’ve already broiled the sugar topping, it may soften over time. For best results, store the custard without the topping and broil it just before serving to maintain that crackly finish.

Broiled Crème Brûlée Recipe
Equipment
- Baking dish Holds the ramekins and water bath.
- Digital thermometer Ensures precise temperature control for the cream.
- Chef knife Used to slice open the vanilla bean and scrape out the seeds with precision.
- Cutting board Provides a stable, safe surface for slicing the vanilla bean.
- Saucepan Used to heat the cream and vanilla.
- Oven mitts For safety when handling hot items.
- Kitchen towels Used to safely handle hot ramekins and dry any spills around the water bath.
- Measuring Spoons Accuracy matters in custards.
- Mixing bowl Whisk the yolks and sugar in this.
- Ramekins Perfect size and depth (6 oz.) for even, gentle baking.
- Tea kettle Helps pour hot water into the baking dish safely.
- Whisk Essential for combining yolks and sugar.
Ingredients
- 6 c. Water
- 2 c. Heavy cream
- 1 ea. Vanilla bean – whole
- ⅛ t. Salt
- 6 ea. Egg yolks – large
- ½ c. Granulated sugar
- ¼ c. Coarse sugar
- Fresh raspberries – for garnish
- Mint sprigs – for garnish
Instructions
- Place the top oven rack in the center position and preheat the oven to 325°F.

- Fill a tea kettle or saucepan with water and set it over high heat to bring to a boil.

- Arrange four 6-oz. ramekins in a large, high-sided baking dish and set aside.

- Pour the cream into a heavy-bottomed saucepan.

- Using a sharp knife, slice the vanilla bean lengthwise.

- Scrape out the seeds (pulp) and add them to the cream, along with the whole vanilla pod.


- Add the salt, stir gently to combine, and set the pan aside until ready to heat.

- Add the egg yolks to a large mixing bowl.

- Pour in the granulated sugar.

- Whisk until the mixture is smooth, pale, and fully combined.

- Set the bowl aside while you heat the cream.

- Set the cream over medium-low heat and bring to a gentle simmer.

- When the cream reaches 180°F on an instant-read thermometer, remove the saucepan from the heat.

- Carefully remove the vanilla bean pod from the pan and either reserve it for another use or discard it.

- Temper the eggs by slowly adding 2 to 3 tablespoons of the warm cream into the egg yolk and sugar mixture while whisking constantly. This gently raises the temperature of the eggs and helps prevent curdling when fully combined.

- Stir to combine, then slowly whisk the tempered egg mixture into the remaining warm cream, continuing to whisk gently until fully incorporated and smooth.

- Remove the kettle from the heat, then carefully pour the hot water into the baking dish surrounding the ramekins to create a water bath. Pour slowly and steadily, making sure no water splashes into the custard inside the ramekins.

- Carefully divide the custard mixture among the ramekins, filling each about ¾ full to avoid overflow.

- Place the baking dish into the preheated oven at 325°F.

- Bake for 45–50 minutes, or until the custard is just set around the edges but still slightly wobbly in the center when gently shaken.

- Carefully remove the baking dish from the oven and let the ramekins cool completely at room temperature. Then, cover each custard and refrigerate for at least 4 hours, or ideally overnight, to allow the custard to fully set and chill.

- Just before serving, move the top oven rack to the upper position, leaving about 3–4 inches between the broiler and the top of the ramekins.
- Then, set your oven to high broil to prepare for caramelizing the sugar topping.

- Sprinkle each ramekin with a thin, even layer of coarse sugar, making sure it covers the surface completely.

- Place the ramekins under the broiler for 4–5 minutes or until the sugar is golden brown and fully caramelized.PS – Watch closely during this step—the sugar can go from perfect to burnt quickly!

- Carefully remove the ramekins from the oven and place them on a baking rack to cool for a few minutes.

- Serve immediately, topped with fresh raspberries and mint sprigs, if desired.

- Enjoy your creamy, crackly masterpiece!

Notes
Important Note:
Cook time will vary based on the depth and size of your ramekins. Shallower ramekins will bake faster, while deeper ones may take longer to bake. Start checking for doneness around 25–30 minutes, and adjust as needed—custards should be set around the edges with a slight jiggle in the center.